As I'm learning Rust, I decided to go for a project. But what should I make? Choosing what to make is always the hardest part when it comes to a side project.
It didn't took long though. I decided to make a pomodoro timer.
The reason for this is because, I started doing a study-with-me live on YouTube. As I do the live, I wanted to display a timer on the screen to share my state: focused and on break.
For example, here's the actual shot of me doing the live with a pomodoro timer I made.

Planning Phase
I started by jotting down some of the basic features for this application. Here's my original note written in obsidian.

The initial name for the program was simply terminal-pomodoro; it's pretty mundane. I asked for LLM's help to generate some good name but meh 🫤
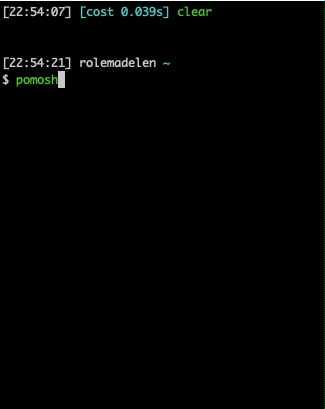
I decided to mix these two words: Pomodoro and Shell. After trying some combinations, I decided to go with Pomosh1.
Implementing Phase
User input
The input is straightforward. I prompt the user and get their inputs for the session and break durations in minutes.
Here's the initial version of the code before I refactored; it's only partial.
fn read_string() -> String {
    let mut input = String::new();
    io::stdin()
        .read_line(&mut input)
        .expect("[read_int()] failed to read an input");
    input
}

fn setup(focus_session: &mut i64, break_session: &mut i64) {
    let focus_bound = [5, 90];
    let break_bound = [2, 90];
    loop {
        print!(
            "How long is the focus session? ({lower}-{upper} minutes): ",
            lower = focus_bound[0],
            upper = focus_bound[1]
        );
        io::stdout().flush().unwrap();
        *focus_session = read_string()
            .trim()
            .parse()
            .expect("failed to parse a focus_session");

        if *focus_session >= 5 && *focus_session <= 90 {
            break;
        }
    }

	// ... break duration
}

fn main() {
	let mut focus_session: i64 = 0;
	let mut break_session: i64 = 0;

	setup(&mut focus_session, &mut break_session);
}
For pomodoro, it's quite unusual to have a session that lasts longer than 90 minutes. So I limited the duration to be between 5 and 90 minutes.
Display time
As you can see from the planning phase, I thought I had to get the current time to make the app get going but I didn't had to. I already know the duration, all I need to do is count it down from x minutes to 0. The question is how.
Rust comes with a native OS threads, so I can use sleep.
Since I'm displaying minutes only, I just need to decrement the minute in every 60 seconds of sleep.
let mut focus_min = 25;

while focus_min >= 0 {
	focus_min -= 1;

	println!("{}", focus_min);

	sleep(Duration::new(60, 0));
}
This will print minutes from 24 to 0.
I want to display the time using ascii art. Thanks to yuanqing, I was able to get all the numbers already defined in ascii format.
000000
00  00
00  00
00  00
000000

1111
  11
  11
  11
111111

...

888888
88  88
888888
88  88
888888

999999
99  99
999999
    99
999999
The problem is that these numbers are all drawn one at a time. How should I print them side by side?
I first stored all of them in an array.
let ascii_art: [&str; 10] = [
	"000000\n00  00\n00  00\n00  00\n000000",
	"1111  \n  11  \n  11  \n  11  \n111111",
	"222222\n     2\n222222\n2     \n222222",
	"333333\n    33\n333333\n    33\n333333",
	"44  44\n44  44\n444444\n    44\n    44",
	"555555\n55    \n555555\n    55\n555555",
	"666666\n66    \n666666\n66  66\n666666",
	"777777\n    77\n    77\n    77\n    77",
	"888888\n88  88\n888888\n88  88\n888888",
	"999999\n99  99\n999999\n    99\n999999",
];
What I'm trying to do is..
- as I count down the duration (e.g.
24), - I'll separate the minutes:
2and4, - use it as an index:
ascii_art[2]andascii_art[4], - and read these strings line by line to print two numbers side by side
fn merge_and_print(a: &str, b: &str) {
    let a = a.to_string();
    let b = b.to_string();

    let a: Vec<&str> = a.split('\n').collect();
    let b: Vec<&str> = b.split('\n').collect();

    for i in 0..5 {
        print!("{}  {}", a[i].bright_blue(), b[i].bright_blue());
        println!();
    }
}
Now I get to print minutes like the following:
 222222  44  44
      2  44  44
 222222  444444
 2           44
 222222      44
Play the chime
I decided to play the audio when the session completes. I used the rust playback library, rodio.
use rodio::{Decoder, OutputStream, Sink};
use std::fs::File;

fn play_audio() {
	let file = File::open("./src/chime.mp3").unwrap();
    let source = Decoder::new(BufReader::new(cursor)).unwrap();
    let (_stream, stream_handle) = OutputStream::try_default().unwrap();
    let sink = Sink::try_new(&stream_handle).unwrap();

    sink.append(source);
    sink.sleep_until_end();
}
After the release, I had an issue with the program not playing the audio. This was because I used File to open the audio. I had to load the audio file at runtime. So I used include_bytes! to embed the file's contents into the binary.
const CHIME_SOUND: &[u8] = include_bytes!("../assets/chime.mp3");

fn play_audio() {
    let cursor = Cursor::new(CHIME_SOUND);
    let source = Decoder::new(BufReader::new(cursor)).unwrap();
    let (_stream, stream_handle) = OutputStream::try_default().unwrap();
    let sink = Sink::try_new(&stream_handle).unwrap();

    sink.append(source);
    sink.sleep_until_end();
}
And here's a completed view of pomosh:
Reflection
I've learned numerous concepts while doing the project. Only couple days in learning Rust, I only knew about std::io. But through this project, I learned about other crates like thread, chrono, SystemTime, rodio, and many others.
Another new thing that I was able to achieve was letting people use homebrew to install this CLI program. I've never done this before, and I got very excited when I was able to install it using brew tap rolemadelen/pomosh && brew install pomosh. I felt like the old days when I was first exposed to the programming.
Want to try it out? Check out the project repository.